Showing posts with label dessert. Show all posts

Friday

Fruit-Filled Hand Pies


 {homemade mixed berry spread}


 {quick photo shoot of Packer while the hand pies baked}


I've never made fruit-filled hand pies before, but I was clearly inspired after making hand pies at my pastry internship at Scratch Baked Goods, in Long Beach, California. I've made a number of pies before, including this strawberry rhubarb pie, and the crust at the bottom is always soggy, and never as flakey and light as the crust. So, some genius created the idea of folding the insides of a pie with the same flakey crust dough to create the same experience, but in a neater and cleaner way. 

You can fill these hand pies with any jam, fruit spread, chopped fruit, pie filling or fruit butter, and the crust will always turn out flakey and light. No more runny insides of a pie that can seriously ruin your day once you slice it (...that has happened to me), but now create smaller, more convenient and equally delicious baked goods for everyone to enjoy. 

Here is the recipe: 

Patee Brisee by Martha Stewart 
Ingredients:
  • 3 3/4 C all-purpose flour
  • 1 1/2 tsp sugar
  • 2 1/2 tsp salt
  • 3 sticks (1 1/2 C) unsalted butter, cold and cut into small pieces
  • 1/2 C ice water, plus more if needed
Directions:
  1. In the bowl of a food processor, combine flour, sugar, and salt; pulse to combine. Add butter, and pulse until mixture resembles coarse crumbs with some larger pieces remaining, about 10 seconds. (To mix by hand, combine dry ingredients in a large mixing bowl, then cut in butter with a pastry blender.)
  2. With the machine running, add ice water through the feed tube in a slow, steady stream, just until dough holds together without being wet or sticky. Do not process more than 30 seconds. Test by squeezing a small amount of the dough together; if it is still too crumbly, add a bit more water, 1 tablespoon at a time.
  3. Turn out dough onto a clean work surface. Divide in half, and place each half on a piece of plastic wrap. Shape into flattened rectangles. Wrap in plastic, and refrigerate at least 1 hour or overnight.
Assembling the hand pies:
adapted by Martha Stewart 
  • About 2 C of fruit, cut into 1/4 inch pieces (I used thinly sliced Granny Smith apples as well as homemade mixed berry spread)
  • 1 tbl granulated sugar (for the apple slices)
  • 1/2 tsp cinnamon (for the apple slices)
  • 1 tbl cornstarch mixed with the zest of 1/2 orange and 1/2 orange's juice (for the apple   slices)
  • 1 egg, lightly beaten
  1. Preheat oven to 375 degrees and prepare two baking sheets with parchment paper. 
  2. Once the dough has chilled for at least one hour, roll it out and cut out as many 5-inch circles as you can. 
  3. With a dry pastry brush, sweep off excess flour. Working with one circle at a time, place 2 tablespoons of your fruit mixture in the center. Brush two connecting edges with beaten egg and fold on the diagonal over the filling, pressing to seal. Repeat process with remaining squares.
  4. Repeat entire process with remaining pate brisee. Place hand pies on prepared baking sheet. Brush pies with remaining egg wash. Using a paring knife, make three cuts in the dough at the top of the hand pie to allow any steam to escape.  
  5. Transfer baking sheets to oven and bake until crusts are golden brown and filling is bubbling, 25 to 30 minutes. Cool slightly on a wire rack. Serve warm.
xo, A

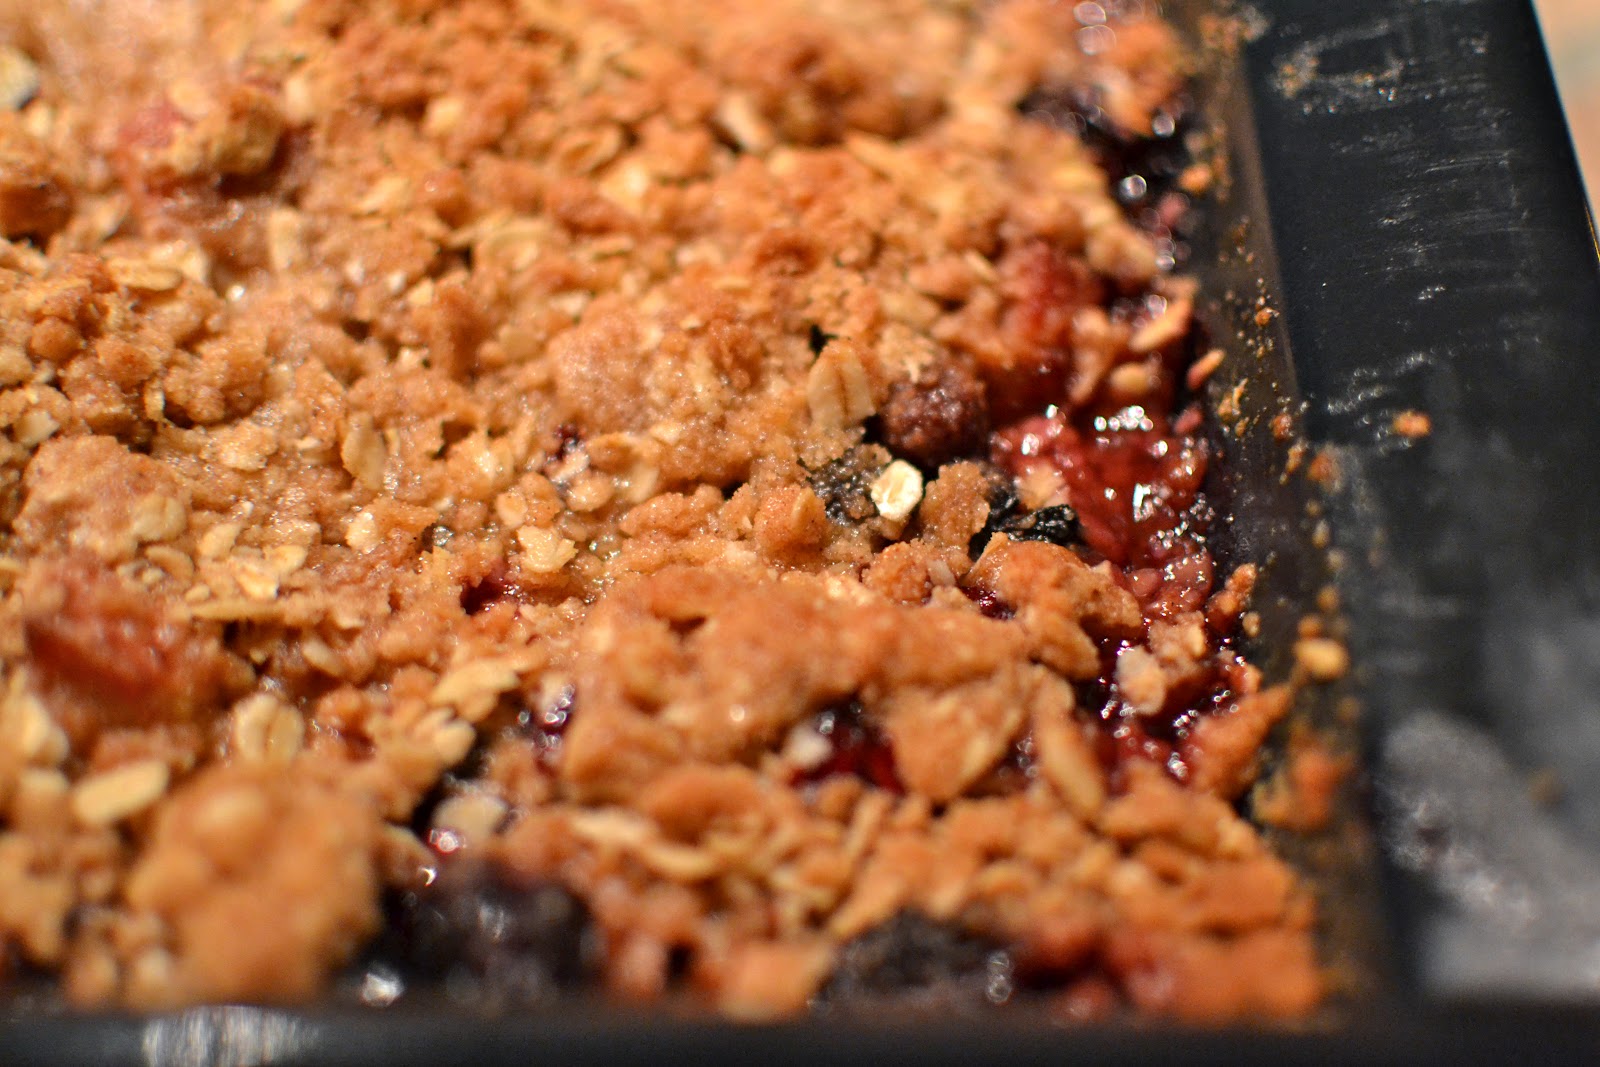
Blueberry Rhubarb Crisp


Okay I know I am starting to have a lot of posts with rhubarb, but I'm not that obsessed with rhubarb, I just had so much left over from the strawberry rhubarb jam! Four pounds worth! I clearly got way too much at the grocery store... oh well. 


When I was back in Washington last month I tried a delicious slice of blueberry rhubarb pie from the cutest bakery. I thought, since I already made a strawberry rhubarb pie, I thought I'd make a crisp instead. I looked at so many recipes for blueberry rhubarb crisps, but I decided to create my own recipe for the filling of the crisp. 


I love crisps that have a bit of cinnamon and nutmeg that remind me of baking in the fall. The taste of the blueberries and rhubarb contrast so well, and the tartness of the rhubarb is more apparent against the sweet blueberries. You'll get both a sweet and a tart taste in this crisp that is so divine! At first it may be an unusual combination to bake with, but blueberries and rhubarb are widely abundant around this time of year, which makes this crisp a perfect summertime dessert. 


Here is my recipe for the filling:

  • 4 C fresh rhubarb, 1/2" to 1" slices
  • 2 C fresh blueberries
  • 1/3 C brown sugar
  • 1/2 C sugar
  • 1.5 tbl all-purpose flour
  • 2 tsp lemon zest
  • 1 tsp lemon juice
  • 1 tsp water

Topping: 
from Cooks
  • 2/3 C all purpose flour
  • 2/3 C oatmeal
  • 1/2 C brown sugar
  • 1/2 C butter, cut into pieces
  • 1/2 tsp cinnamon
  • 1/4 tsp nutmeg
  • 1/4 tsp salt

  1. Preheat oven to 375. Prepare a 8 x 8 x 2 baking dish by buttering the inside. 
  2. Combine the sliced rhubarb, blueberries, brown sugar, sugar together. Add the flour, lemon zest, lemon juice and water, and combine gently. 
  3. Pour mixture into buttered pan, then start making the topping. Combine the flour, oats, brown sugar, cinnamon, nutmeg and salt into a bowl. Add the sliced butter and combine with a fork until crumbly - sprinkle over the fruit covering it completely. 
  4. Place in the oven and bake for about 30 minutes, until the fruit is bubbling. Serve warm with ice cream, whipped cream or neither. 

Enjoy! 
xoxo, A


Saturday

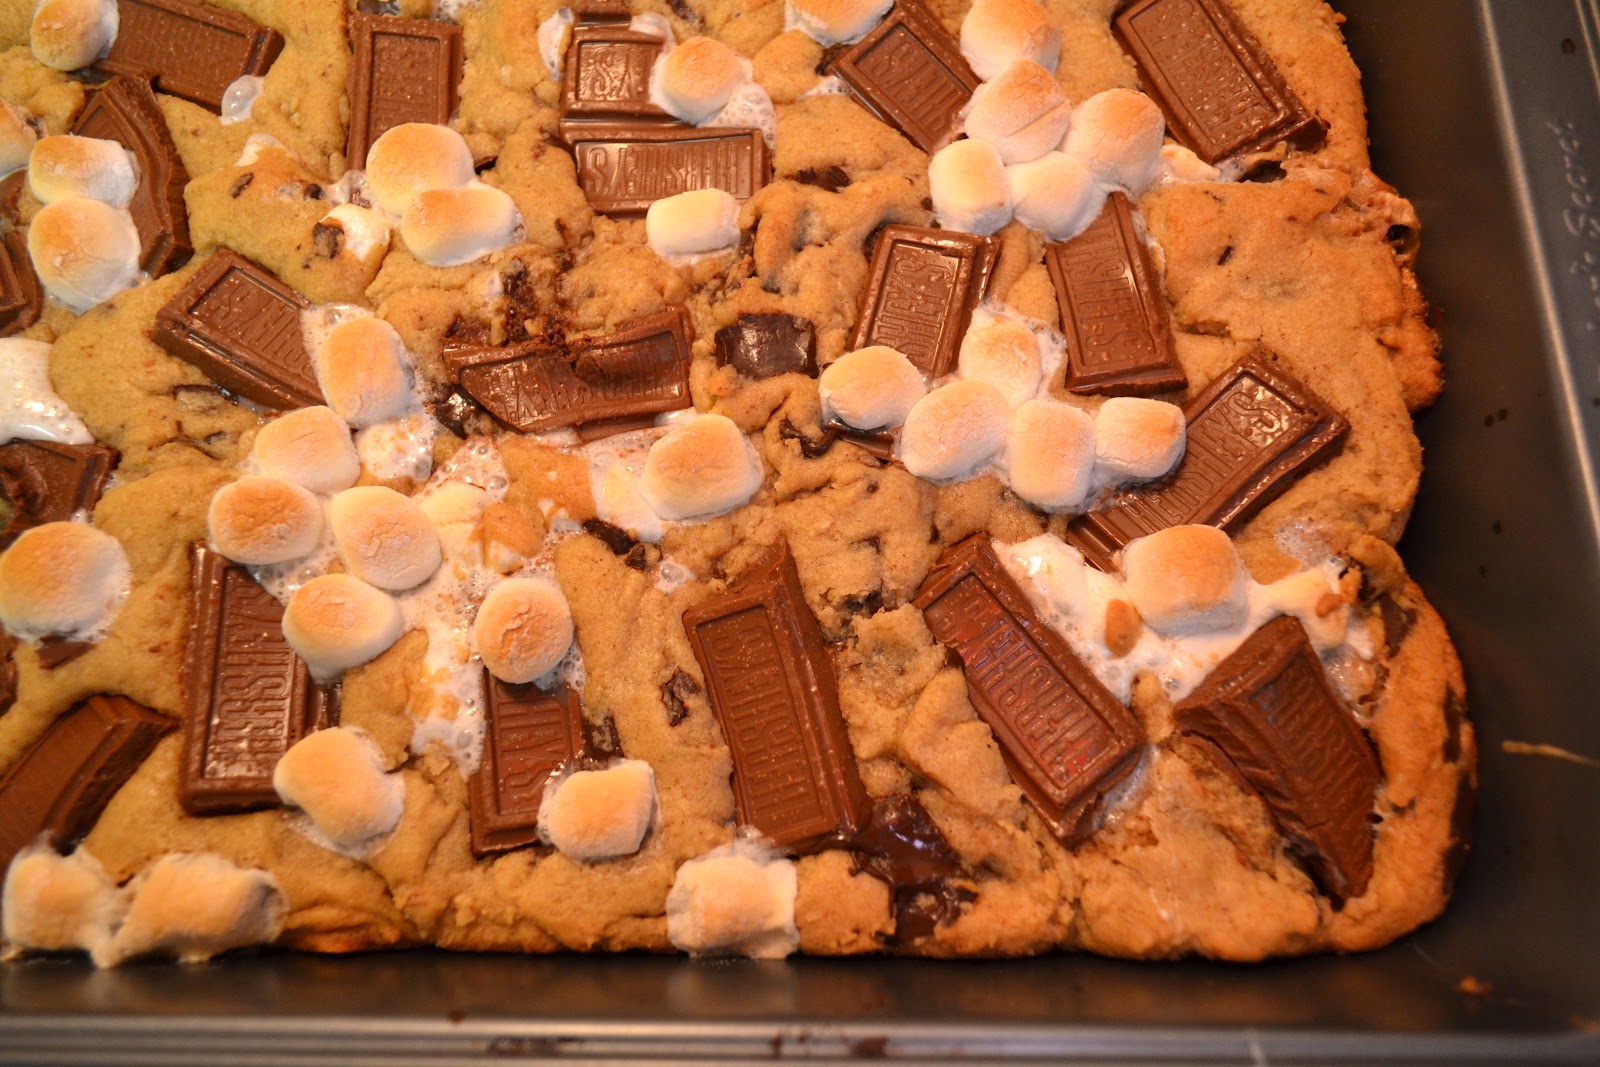
S'mores Cookie Bars


These S'mores cookie bars are so deadly. If you make these, I guarantee you'll be making another batch the next day... that's what I did! The first batch of bars were gone overnight, and the second batch was gone in less than a day. Might as well use up all the ingredients you have for this recipe, right? Honestly, they are so addicting and the idea is genius. It's hard to make real s'mores without a fire pit or a bonfire, so these bars are the ideal replacement for a quick summertime treat. 

The bars were quick and easy to make; in about 15 minutes you'll have delicious, to-die-for s'mores cookie bars that will disappear in minutes. There's nothing tricky or difficult about this recipe at all - if anything, it was fun making both batches!

Here is the recipe: 

Ingredients: 
  • 2/3 C butter, softened
  • 1 C brown sugar, packed
  • 1/2 C granulated sugar
  • 2 eggs
  • 1 tsp vanilla extract
  • 1 tsp baking soda
  • 3/4 tsp salt
  • 1 tsp cinnamon
  • 2 1/4 cups flour
  • 11 oz. dark chocolate chunks (I used semi-sweet instead)
  • 3 regular (or 2 large) sized Hershey bars, broken into pieces 
  • 2 sleeves of graham crackers, broken into squares 
Directions: 
  1. Preheat oven to 375 degrees F. Lay out graham crackers on a large rimmed baking sheet leaving no gaps between them. Set aside. 
  2. Whisk together flour, baking soda, salt and cinnamon in a medium bowl. Set aside. 
  3. In a large bowl, cream together butter and sugars with an electric mixer until fluffy, about 2-3 minutes. 
  4. Incorporate vanilla then add eggs one at a time, beating well after each addition. 
  5. Gradually beat in flour mixture. Fold in chocolate chunks and only 1 C of marshmallows. 
  6. Using an ice cream scooper, place balls of cookie dough on the graham cracker in the baking sheet. Press out the dough to spread it out a little bit. 
  7. Bake for only 5 minutes then press Hersehy pieces and the remaining 1/4 C of marshmallows on top. Bake for 5-7 more minutes. 
  8. Cool bars in the pan. Cut through the cookie layer into squares, making sure to cut where the graham crackers meet. 
The bars are best when slightly warm - you definitely won't be able to wait until they are fully cooled! 

XO, A


Monday

Strawberry Rhubarb Pie


I have never tasted rhubarb before - all I knew about it was that it looked like red celery. I did some research on rhubarb before starting the pie and this site explains how "rhubarb is often commonly mistaken to be a fruit but rhubarb is actually a close relative of garden sorrel, and is therefore a member of the vegetable family." But, this site says that since rhubarb is so often used as a fruit in pies and other desserts, that it's considered a fruit... I thought, hmm okay... fruit or vegetable?! Whatever, I'll just go with it. 


Over the weekend I went to Bainbridge Island with my boyfriend and went to their farmer's market in 'downtown' Bainbridge. That was where I saw rhubarb stalks for $1 each and knew I had to get some. I ended up getting only 2 stalks, and thinking back I should have gotten way more to use in other recipes! Oh well, guess I'll have to go back to Bainbridge Island next weekend.. :)


Anyway, there were many recipes out there for strawberry-rhubarb pie. I chose this recipe because, like many other recipes on Smitten Kitchen, I had a feeling it was going to taste the best out of the others. She had 2 recipes to choose from, but I chose to go with the one she made 'improvements' on... I'm sure both recipes taste wonderful though! 

I love how beautiful this pie is, the fruits really stand out, not only in color but in flavor as well. Rhubarb originally has a strong tart taste to it, but when it is baked with sugar and strawberries, it gets much sweeter. I love the taste of rhubarb now; i've learned that you can add rhubarb to many, many desserts, such as: bars, breads, cakes, muffins, jams, and tarts. I think I'm going to have to try making jam with rhubarb next! 

Here is the recipe: 
from Smitten Kitchen

  1 recipe All Butter, Really Flaky Pie Dough or double-crust pie dough of your choice
  3 1/2 C (about 1 1/2 pounds, untrimmed) rhubarb, in 1/2-inch thick slices
  3 1/2 C (about 1 pound) strawberries, hulled and sliced if big, halved if tiny
  1/2 - 3/4 C granulated sugar
  1/4 C light brown sugar
  1 tbl lemon juice
  1/4 tsp salt
  1/4 C quick-cooking tapioca
  2 tbl unsalted butter, cut into small pieces
  1 large egg yolk beaten to blend with 1 tsp water (for glaze)

1.Preheat oven to 400 degrees. On a well-floured counter, roll half of pie dough into a 12-inch circle and carefully transfer to a 9-inch pie plate. Deb says to fold the dough into quarters for easy transfer to the pie plate.)
2. Stir together rhubarb, strawberries, sugars, lemon, salt and tapioca in a large bowl. Mound filling inside bottom pie crust and dot with bits of unsalted butter. Roll second half of pie dough into an 11-inch circle and cut decorative slits in it. Transfer it to center over the pie filling. Trim top and bottom pie dough so that their overhang beyond the pie plate lip is only 1/2-inch. Tuck rim of dough underneath itself and crimp it decoratively.
3. Transfer pie to a baking sheet and brush egg yolk mixture over dough. Bake for 20 minutes then reduce temperature to 350 degrees and bake for an additional 25 to 30 minutes, until the pie is golden and the juices bubble visibly.
4. Transfer pie to wire rack to cool. When fully cool (several hours later) the juices gel.

The pie will keep for up to 3 days at room temperature. Enjoy the pie with some vanilla ice cream, or simply on its own! 


XOXO, A


Friday

The Best Blondies


To be honest, I didn't know what blondies were when I first heard of them. I knew they baked like brownies, but didn't know the significance behind the name. But duh... it's because brownies look like brunettes and blondies like blondes... um sorry took me a while to get that one. Anyway, I love the idea of  combining a chocolate chip cookie and a brownie; blondies have the taste of a chocolate chip cookie, but instead they have gooey middles which are delicious. I might just like them more than brownies... we will see. 


I got this recipe from Smitten Kitchen and the recipe can adapted in any way you like. I thought about adding mashed up bananas, but thought I would test out the recipe first then experiment later. I am now definitely going to add some bananas, maybe some dried fruit or white chocolate chips to my next batch! I will run some tests and let you all know!

I know I haven't been my best in keeping up with my baking, but I am doing some serious planning. Three more weeks and I will be done with school and will have my wonderful kitchen back home in LA! I can't wait. I am dying to make a strawberry-rhubarb pie... but in the mean time while I am here in Seattle I will make a Banoffee pie, French sugar puffs, and I'm thinking some ice cream sandwiches to start off the summer right! 

Here is the recipe: 
from Smitten Kitchen:
  8 tbl (1 stick, 4 ounces or 113 grams) butter, melted
  1 C (218 grams or 7 3/4 ounces for light; 238 grams or 8 3/8 ounces for dark) brown sugar
  1 large egg
  1 tsp vanilla or 1/2 teaspoon almond extract
  Pinch salt
  1 C (4 3/8 ounces or 125 grams) all-purpose flour

1.        Butter an 8×8 pan
2.       Mix melted butter with brown sugar – beat until smooth. Beat in egg and then vanilla.
3.       Add salt, stir in flour. Mix in any additions (below).
4.       Pour into prepared pan. Bake at 350°F 20-25 minutes, or until set in the middle. Cool on rack before cutting them.

Further additions, use one or a combination of:
  1/2 to 1 C chopped nuts, toasting them first for even better flavor
  1/2 to 1 C chocolate chips
  1/2 tsp mint extract in addition to or in place of the vanilla
  1/2 C mashed bananas
  1/4 C bourbon, scotch or other whiskey; increase the flour by one tablespoon
  2 tbl of espresso powder with the vanilla
  Stir 1/2 C dried fruit, especially dried cherries, into the prepared batter
  Top with a vanilla butter cream or chocolate peanut butter cream frosting

xoxo, A


Wednesday

Apple and Pear Crisp


Finally a new post! Apologies for such a long wait - there has been way too much going on, BUT I promised myself that I will not go 2 weeks without blogging again. Ever again! It was the longest 2 weeks ever! Anyway, sorry again, and hopefully this apple and pear crisp will make up for it... Maybe?  Okay if it doesn't, I'll win you over with my next post. 

Back to the apple and pear crisp: making apple crisps reminds me of Thanksgiving baking and winter baking - the smells of cinnamon and nutmeg fill throughout the house while the crisp is baking and I just love it! I love cutting the pears and apples into large chunks because that's just how I've grown up baking apple crisps. You can cut them any way you like though; everyone needs to find or create their favorite crisp recipe! The lemon and orange flavors in this crisp really bring out the nutmeg and cinnamon while they're absorbed into the fruit - it's to die for! Make this traditional crisp anytime you're feeling a warm and comforting dessert that reminds you of home, or if you just have a sweet tooth and love the combination of fruit and spices! 

Here is the recipe:
from Ina Garten

Ingredients: 
  • 2 pounds ripe Bosc pears (4 pears)
  • 2 pounds firm Macoun apples (6 apples - I used Fuji apples)
  • 1 tsp grated orange zest
  • 1 tsp grated lemon zest
  • 2 tbl freshly squeezed orange juice
  • 2 tbl freshly squeezed lemon juice
  • 1/2 C granulated sugar
  • 1/4 C all-purpose flour
  • 1 tsp ground cinnamon
  • 1/2 tsp ground nutmeg
For the topping: 
  • 1 1/2 C all-purpose flour
  • 3/4 C granulated sugar
  • 3/4 C light brown sugar, lightly packed
  • 1/2 tsp kosher salt
  • 1 C old-fashioned oatmeal
  • 1/2 pound (2 sticks) cold unsalted butter, diced 
  1. Preheat the oven to 350 degrees F. 
  2. Peel, core, and cut the pears and apples into large chunks. Place the fruit in a large bowl and add the zests, juices, sugar, flour, cinnamon and nutmeg. Pour into a 9 by 12 by 2-inch baking dish. 
  3. For the topping, combine the flour, sugars, salt, oatmeal and butter in the bowl of an electric mixer fitted with the paddle attachment. Mix on low speed for 1 minute, until the mixture is in large crumbles. Sprinkle evenly over the fruit, covering the fruit completely. (the topping is the best part!)
  4. Place the baking dish on a sheet pan and bake for 50 minutes to 1 hour, until the top is brown and the fruit is bubbly. Serve warm (and with some vanilla ine cream!)
xoxo, A


Tuesday

Cinnamon Sugar Pull-Apart Bread


Oh my goodness... yum. Yum, yum, yum! This cinnamon sugar pull-apart bread was a delicious combination of monkey bread and a cinnamon roll. The top of the bread was golden and crunchy, while the center is soft like a cinnamon roll. The best part of this recipe? It was easy to make! The longest part was waiting for the dough to rise before rolling it out and before putting it in the oven. But it all went by very quickly and the bread only lasted about 10 minutes in front of quite a few people... success. 

Next time I make this (very soon) I want to add a confectioners' sugar glaze to add some more sweetness and so it tastes more like a cinnamon roll. Sounds like a great idea to me. 

Here is the recipe: 

Dough: 
  • 2 3/4 C plus 2 tbl all-purpose flour
  • 1/4 C granulated sugar
  • 2 1/4 teaspoons (1 envelope) active dry yeast
  • 1/2 tsp salt
  • 2 ounces unsalted butter
  • 1/3 C milk
  • 1/4 C water
  • 2 large eggs, at room temperature
  • 1 tsp vanilla extract 
Filling: 
  • 1 C granulated sugar
  • 2 tsp ground cinnamon
  • 1/2 tsp fresh ground nutmeg
  • 2 ounces unsalted butter, melted until browned
  1. In a large mixing bowl (I used just the bowl of my stand mixer) whisk together 2 cups flour, sugar, yeast, and salt.  Set aside.
  2. Whisk together eggs and set aside.
  3. In a small saucepan, melt together milk and butter until butter has just melted.  Remove from the heat and add water and vanilla extract.  Let mixture stand for a minute or two, or until the mixture registers 115 to 125 degrees F.
  4. Pour the milk mixture into the dry ingredients and mix with a spatula.  Add the eggs and stir the mixture until the eggs are incorporated into the batter.  The eggs will feel soupy and it’ll seem like the dough and the eggs are never going to come together.  Keep stirring.  Add the remaining 3/4 cup of flour and stir with the spatula for about 2 minutes.  The mixture will be sticky, but that's alright. 
  5. Place the dough is a large,  greased bowl.  Cover with plastic wrap and a clean kitchen towel.  Place in a warm space and allow to rest until doubled in size, about 1 hour.  OR *The dough can be risen until doubled in size, then refrigerated overnight for use in the morning.  If you’re using this method, just let the dough rest on the counter for 30 minutes before following the roll-out directions below.
  6. While the dough rises, whisk together the sugar, cinnamon and nutmeg for the filling.  Set aside.  Melt 2 ounces of butter until browned.  Set aside.  Grease and flour a 9x5x3-inch  loaf pan.  Set that aside too.
  7. Deflate the risen dough and knead about 2 tablespoons of flour into the dough.  Cover with a clean kitchen towel and let rest for 5 minutes.  On a lightly floured work surface, use a rolling pin to roll the dough out.  The dough should be 12-inches tall and about 20-inches long.  If you can’t get the dough to 20-inches long… that’s okay.  Just roll it as large as the dough will go.  Use a pastry brush to spread melted butter across all of the dough.  Sprinkle with all of the sugar and cinnamon mixture. 
  8. Slice the dough vertically, into six equal-sized strips.  Stack the strips on top of one another and slice the stack into six equal slices once again.  You’ll have six stacks of six squares.  Layer the dough squares in the loaf pan like a flip-book.  Place a kitchen towel over the loaf pan and allow in a warm place for 30 to 45 minutes or until almost doubled in size.
  9. Place a rack in the center of the oven and preheat to 350 degrees F.  Place loaf in the oven and bake for 30 to 35 minutes, until the top is very golden brown.  The top may be lightly browned, but the center may still be raw.  A nice, dark, golden brown will ensure that the center is cooked as well.
  10. Remove from the oven and allow to rest for 20 to 30 minutes.   Run a butter knife around the edges of the pan to loosen the bread and invert onto a clean board.  Place a cake stand or cake plate on top of the  upside down loaf, and carefully invert so it’s right side up.  
The bread lasts for about 2 days, tightly wrapped, but I'm sure you'll have no problem finishing it the day it is made. 

xoxo, A


Sunday

Cookies and Cream Ice Cream


I love cookies and cream ice cream, it reminds me of the days of getting a single scoop of cookies and cream at Rite Aid, when it was only .99! Now, I would way rather make my own ice cream, which is definitely healthier and more fun to make. I made this right in time for my birthday, which was yesterday, so its been a delicious dessert the past couple days. For this recipe, I used Trader Joe's Joe-Joe's Cookies, which are just like Oreo's, but have all natural flavors, no hydrogenated oils, and made with real vanilla bean specks. The ice cream turned out creamy and rich, and was much easier to make than a custard based ice cream. Since I don't have an ice cream maker, I changed the steps around so I could do the freezer method. I also used more cookies than called for, and crushed some of them up to be very small so that the base would be more chocolatey. Of course I mixed in bigger cookie pieces, because for me, that's my favorite part of cookies and cream ice cream. 

Here is the recipe (with my changes):

  • 1.5 C almond milk (or 1 C whole milk)
  • 3/4 C sugar
  • pinch of salt
  • 2C heavy cream
  • 1 tbsp vanilla
  • 20-25 Trader Joe's Joe-Joe's Cookies

  1. In a medium bowl, combine almond milk, sugar and salt. Whisk or beat for several minutes until the sugar has dissolved completely. Add the cream and vanilla. Give a quick stir to blend. Cover and chill for around 1-2 hours. 
  2. Chop up the 20-25 cookies in an irregular manner. If you want a more vanilla base, add less cookies, but if not, add some more! Grab the chilled bowl, and add the chopped up cookies. Cover the bowl with plastic wrap and place in the freezer. If you have an ice cream maker, this would be where you would follow your manufacturer's directions. If you don't have an ice cream maker, make sure you check on your ice cream every 30-40 minutes to make sure the ice cream doesn't harden and form ice crystals; mix the ice cream with a spatula or spoon each time you check it. 
  3. After you reach a creamy consistency, transfer the ice cream to a covered container to store. At this point, store the ice cream in the freezer for a couple hours to let it harden a little. This ice cream won't harden too much though - it's perfect for scooping. 

Enjoy!

xoxo, A

Saturday

Cherry Marmalade

{pitting the cherries by halving them with your hands}
{chopping the unpeeled orange}
{lower left: boiling the jars to keep them hot and clean; lower right: boiling the cherries, orange and lemon juice; upper right: heating the metal lids to keep them warm before canning}
{pouring the marmalade into the jars}


Canning fruits has become very popular in my household. We also love cherries, so cherry marmalade seemed like a fabulous idea. Cherries are in season and perfect for the holidays; the marmalade can be used on toast in the morning, over ice cream, over pound cake, on top of muffins, anything you like! 


I followed this recipe, which is the same exact recipe as the one we originally had used in the Ball Complete Book of Home Preserving. That book is all you need to know about learning how to make jellies, jams, preserves and marmalades - it is so helpful and easy to follow! 


The difference between jams, jellies and preservatives lies at the consistency and form of the fruit being used. Jellies contain fruit in the form of juice only; jams contain fruit in the form of pulp; and preserves contain fruits in the form of larger chunks; and finally, marmalade contains citrus preserved fruits. I was initially confused on this, so I had to find out the difference between all these! 


Merry Christmas and enjoy the pictures! 
xoxo, A