Showing posts with label breakfast. Show all posts

Tuesday

Strawberry Rhubarb Jam


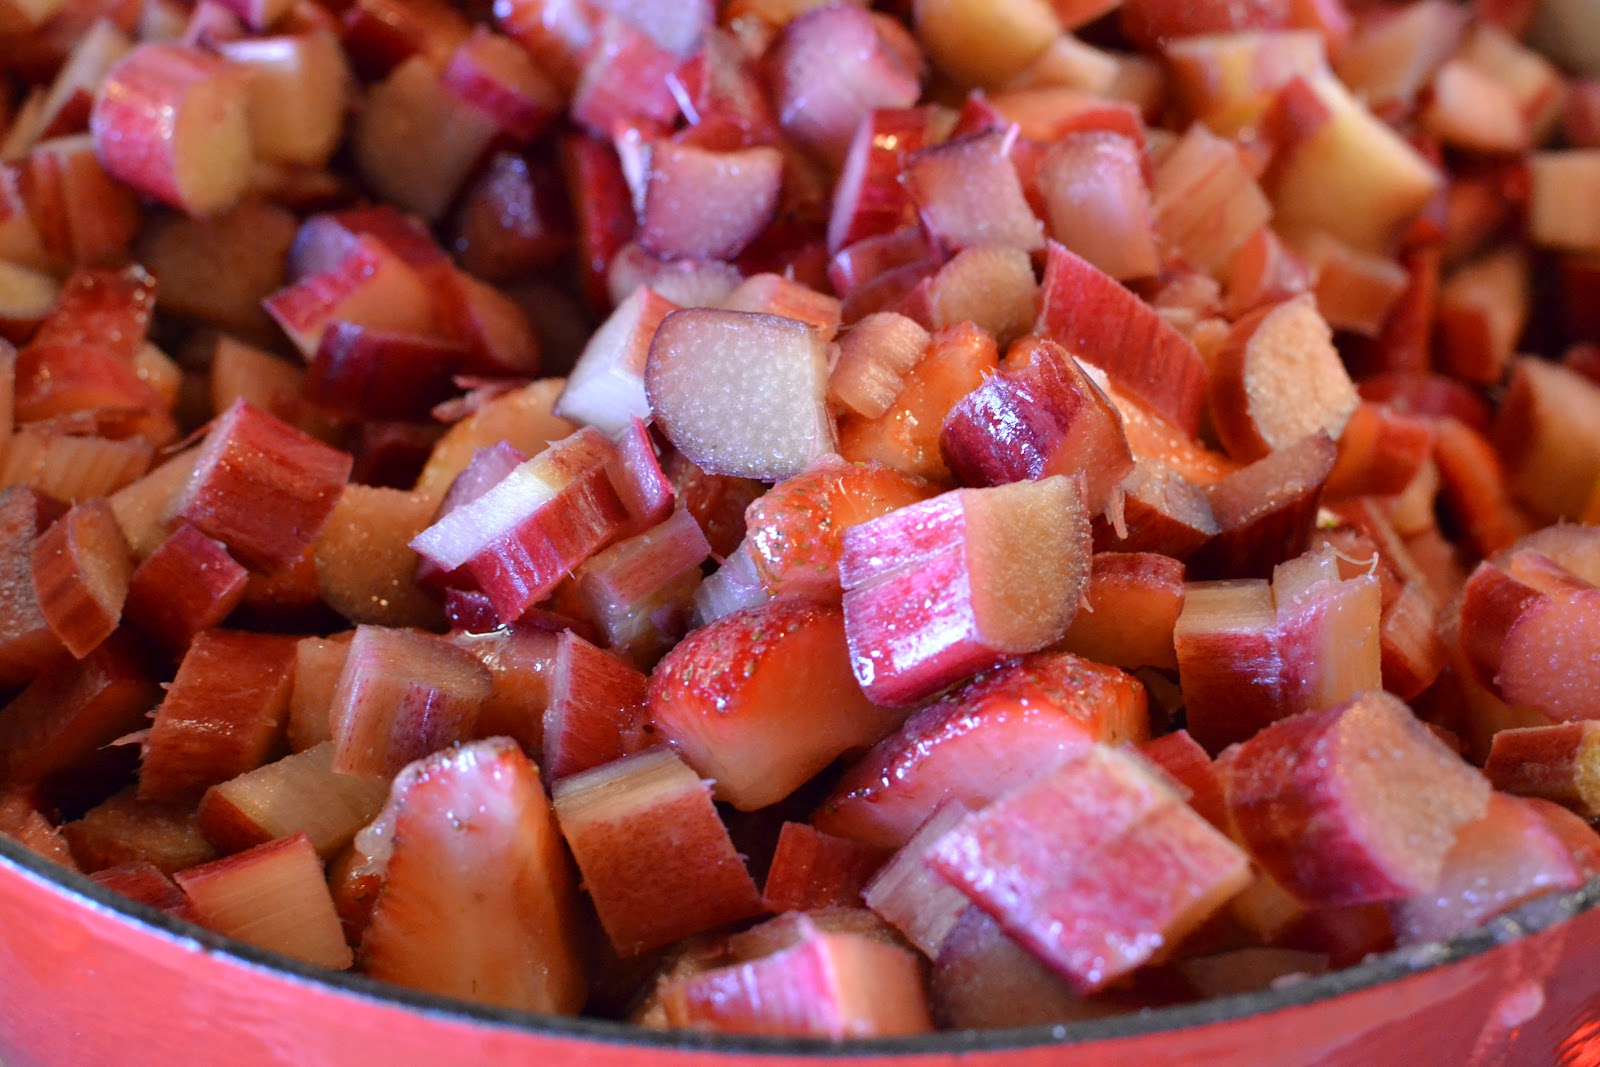
I just love rhubarb now. I honestly never thought I would like the tart and sour fruit (...vegetable??), but it cooks and blends so nicely with other sweet fruit. I've been wanting to make strawberry rhubarb jam with my mom ever since I saw the first few stalks of rhubarb at the farmers markets in Washington. I told her she had to buy like 4 pounds of rhubarb or I wasn't coming home. Ha kidding... I went home and went on a huge search to find rhubarb at all my local grocery stores (my local farmers market wasn't until the weekend.. bummer.)

The rhubarb that was out on display at 2 of my local grocery stores had definitely been picked over... so that wasn't going to cut it. They happily got more in the back for me and I ended up getting a huge portion of it. I knew that all the rhubarb that the recipe called for would eventually cook down; this recipe only makes about 6 pints! It's not that much for all the fruit it requires. The jam is still delicious and definitely worth making - it's now officially the favorite jam so far in my family! The recipe doesn't require any extra pectin and doesn't have a ginormous amount of sugar like 7 cups that I've seen in many recipes online. The strawberries already make the jam so naturally sweet. 

After making this jam, my mom and I made decided to continue canning so we made a fruity Victorian barbecue sauce, which had the most interesting and unique combinations of fruits and spices! That post will come soon! 

Here is the recipe: 

Ingredients:
  • 3 1/2 pounds of rhubarb, 1/2 inch slices
  • 4 quarts of strawberries, hulled and quartered
  • 3 cups of sugar
  • Juice of 2 lemons
Directions: 
  1. Place the sliced fruit in a very large pot over the stove. Add the lemon juice and sugar and mix until everything is combined. 
  2. Turn the heat to medium-high, the liquid from the fruit will begin to boil. Keep on medium-high heat for about one hour, stirring very frequently so the fruit on the bottom does not burn. (Tip: You can stir in about 1 teaspoon of butter in the pot if the foam from the boiling is out of control!)
  3. You can use the frozen spoon or plate test to find out whether the jam is finished cooking. Use this page for directions - it explains both tests very well! When your jam is finished, you can process the jam in washed and warmed jars for canning, or just place the jam in your own jars for personal use! 
  4. If you are processing the jars, fill them and close them fingertip tight. Place them under boiling water to process for 10 minutes. Remove them after the 10 minutes is finished, and let them cool on the counter. 
  5. Add labels or tags to decorate them as gifts to friends, family or neighbors! The perfect summer gift for anyone. 

xoxo, A


Sunday

French Lemon-Poppy Pound Cake


While making this delicious lemon pound cake out of Joanne Chang's Flour baking book, I learned that the name "pound cake" came from the original recipe that consisted of a pound of flour, a pound of butter, a pound of sugar, and a pound of eggs. Unbelievable/kind of weird, right? I totally did not know this, but it makes sense because all pound cakes result in a velvety, but tight cake texture.

I love pound cake, especially lemon, so I thought I'd try Joanne Chang's recipe since all of her recipes are fabulous and delicious. The lemon glaze easily brings out the rest of the lemon and poppy seed flavor in the rest of the cake; the perfect combination! 

Here is the recipe:

Pound Cake
  • 2 C cake flour
  • 3/4 tsp baking powder
  • 1/2 tsp kosher salt (or 1/4 table salt)
  • 1/2 C + 3 tbl unsalted butter, melted and slightly warm
  • 1/4 C heavy cream
  • 3 tbl finely grated lemon zest (about 2 lemons)
  • 1 tbl fresh lemon juice
  • 3 tbl poppy seeds
  • 4 eggs
  • 1 1/4 C granulated sugar
Lemon Glaze
  • 1/2 C confectioners' sugar
  • 1 to 2 tbl fresh lemon juice 
  1. Preheat oven to 350 degrees F. Butter and flour a loaf pan. In a medium size bowl sift together dry ingredients: flour, baking powder, salt. 
  2. In another large bowl, whisk together the butter, cream, lemon zest, lemon juice, and poppy seeds. The mixture should have the consistency of a thick liquid. If the butter hardens into little lumps, reheat the mixture slightly until the butter melts again. 
  3. Using a stand mixer or a hand mixer, beat together eggs and sugar until light and fluffy and lemon colored. This will take about 4-5 minutes for a stand mixer or 8-10 for a hand mixer. 
  4. Gently fold the flour mixer into the egg mixture using a rubber spatula. Fold about one-fourth of the egg-flour mixture into the butter-cream mixture. Then fold in the remaining egg-flour mixture until just thoroughly combined. 
  5. Pour into prepared pan and bake for about 1 hour to 1 hour 10 minutes; until the top of the cake is golden brown and springs back when you press it in the middle. Let it cool in the pan on a wire rack for 3o minutes. 
  6. Make the lemon glaze while the cake is still cooling: whisk the confectioners' sugar and enough of the lemon juice to make an easily spreadable, smooth glaze. Wait until the cake is cooled, but still slightly warm, to spoon or spread the lemon glaze. 
This was a perfect dessert after dinner, though it was hard to resist not diving in after it was finished...

xoxo, A 


Thursday

Homemade Doughnut Holes


I'm definitely not a doughnut person, but I have been thinking about making doughnut holes for a while ever since I got a candy thermometer. I didn't want to make the famous circular shape doughnut, because I've seen homemade versions of these fail miserably, and plus doughnut holes are so much cuter. So, I was deciding between chocolate doughnut holes, or the original, and went with the original to test out the whole frying process. 

Let's just say I still have a minor burn on my hand from the frying, so beware if you plan on making these. The doughnuts do taste amazing though, these doughnuts add a wonderful hint of nutmeg that almost completes the taste of the doughnut. The glaze is the other part that completed the mini bread balls - I used 2 cups of confectioners sugar, 1 teaspoon vanilla extract, and 1/4 cup milk and heated it all in a small saucepan. I dipped them and sprinkled rainbow sprinkles for added cuteness before the glaze dried. They were all tried and loved and eaten within the day... clearly were a great hit!

xoxo, A

Tuesday

Healthy Cherry-Berry Ice Cream

 {combing sugar, gelatin and milk until just boiling}
 {pitting the cherries and about to chop them}
 {everything combined together and cooking}
 {ready for the chill}


I've been researching the many ways to make ice cream and figuring out which way would be easiest since I don't own an ice cream maker. I've heard of the bag method, but after I did some research and found David Lebovitz's post on making ice cream with no machine. His way seemed pretty simple and straight forward, so I decided to follow this recipe and make healthy (and delicious, of course!) cherry-berry ice cream. 


I followed the recipe exactly - afterwards I read up on the outcomes of homemade ice cream on other blogs and I realized that homemade ice cream will never be as smooth as store bought ice cream. With that said, definitely use a thermometer to make sure your custard is at the right temperature! Otherwise your ice cream will bet very grainy and not very smooth.  


The bits of cherries add a very sweet taste to the ice cream, and the raspberries add a tart kick that is much appreciated. This ice cream (which is only 103 calories per 1/2 cup serving!) is perfect for a movie night or just for a healthy, sweet tooth craving.


xoxo, A

Friday

Perfect and Healthy Blueberry Muffins

{using an ice cream scooper is so easy to fill the muffin pans}

{2 batches disappeared pretty fast...}
{warmed up + butter = the perfect breakfast}


Muffins are perfect for an on-the-go breakfast or a sweet indulge during the day. These muffins are not only moist and fluffy, but are healthy! (major bonus) They are made with wheat flour and nonfat plain Greek yogurt, which adds more texture, and a hint of lemon zest for a nice kick - I added a little more lemon to increase the flavor!


You can certainly switch blueberries for raspberries or for blackberries, whatever fits your preference. I would love to bake my next batch with raspberries or cranberries - love them! You can also add a brown sugar cinnamon streusel mixture to the top before baking to add some extra sweetness. These blueberry muffins are a perfect addition and would be a huge hit at a New Years Day brunch. 


xoxo, A

Saturday

Cherry Marmalade

{pitting the cherries by halving them with your hands}
{chopping the unpeeled orange}
{lower left: boiling the jars to keep them hot and clean; lower right: boiling the cherries, orange and lemon juice; upper right: heating the metal lids to keep them warm before canning}
{pouring the marmalade into the jars}


Canning fruits has become very popular in my household. We also love cherries, so cherry marmalade seemed like a fabulous idea. Cherries are in season and perfect for the holidays; the marmalade can be used on toast in the morning, over ice cream, over pound cake, on top of muffins, anything you like! 


I followed this recipe, which is the same exact recipe as the one we originally had used in the Ball Complete Book of Home Preserving. That book is all you need to know about learning how to make jellies, jams, preserves and marmalades - it is so helpful and easy to follow! 


The difference between jams, jellies and preservatives lies at the consistency and form of the fruit being used. Jellies contain fruit in the form of juice only; jams contain fruit in the form of pulp; and preserves contain fruits in the form of larger chunks; and finally, marmalade contains citrus preserved fruits. I was initially confused on this, so I had to find out the difference between all these! 


Merry Christmas and enjoy the pictures! 
xoxo, A

Monday

Dark Chocolate Muffins with Mint M&Ms


Last night at my house we had a Christmas Gift Exchange party with my mom's side of the family and I was so happy to get the Homegrown Muffin Pan and Rolling Pin from Anthropologie! The muffin pan and rolling pin were both on my Holiday Gift Guide Under $50 (what a coincidence...) They are both so adorable and almost too beautiful to use... but I couldn't resist and used the muffin pan anyway. 


I was semi sick of staring at our large bag of Christmas edition Mint M&Ms (more like the M&Ms staring at me) so I wanted to incorporate them into muffins. I decided to use this recipe, with some adjustments like 3/4 C crushed Mint M&Ms instead of chocolate chunks. I also omitted adding the mint extract because I knew the crushed up Mint M&Ms would add some flavor. 


You could add the mint extract for even more of a kick to the muffins, or add the chocolate chunks as well as the M&Ms. The will be delicious for breakfast in the morning, warmed up with a cup of coffee! Delicious! 


More muffins to come with my precious new muffin pan!


xoxo, A


Brioche Cinnamon Rolls


As mentioned earlier, I was in charge of making these lovely treats on Thanksgiving morning. I have never made homemade cinnamon rolls before so I knew this was going to be fun.

For the dough I used the same recipe I posted earlier for the Brioche bread. After the second rise I rolled out the dough into a square and used a cinnamon and sugar mixture to layer over the dough. After the dough is rolled up, I cut into 1.5 inch slices and let the rolls rise on baking sheets for another hour.

After the hour, I placed the rolls in a baking pan with parchment paper, and baked at 350 for about 10 minutes. For the icing, I made a cream cheese and orange icing which was so delicious! I added about 6 oz of cream cheese to a basic confectioners sugar and milk icing, then added some orange zest. Mmmm the orange was a perfect touch to the icing!

I highly recommend making these cinnamon rolls for a morning with the family - I have a feeling I will make these again for Christmas Morning!

xoxo, A

Friday

Homemade Pop-Tarts


I made these pop-tarts over the summer when I was back home in California, so I decided to make them again since it’s been a while. This recipe is also from Joanne Chang’s Flour Cookbook - it’s a very easy and delicious recipe! The pastries are perfectly cripsy, flaky and buttery. I suggest rolling out the dough thinner than you want because the dough will rise slightly while baking in the oven - you don’t want super thick pop-tarts that will over-power the filling! 
For the fillings I chose a pear jam that I bought at a farmers market over the weekend, along with a cinnamon sugar mixture. Three pop-tarts filled with pear jam and three filled with cinnamon sugar. 
The pop-tarts turned out amazing - every time I make these they turn out even better than the last time! 
Here is the recipe:
Pâte Brisée (the dough): makes about 18 oz dough, enough for about 6-7 pop-tarts.
  • 1 3/4 C unbleached all-purpose flour
  • 1 tbl sugar
  • 1 tsp kosher salt
  • 1 C (2 sticks) cold unsalted butter, cut into 12 pieces (I cut mine and put it in the freezing right up until I used the butter - the colder the better!)
  • 2 egg yolks
  • 3 tbl cold milk

    1. Mix together flour, sugar and salt in a large bowl. With a hand mixer or a stand mixer, scatter cold butter over the flour mixture and mix on low speed for about 1 minute (until the flour is no longer white and butter clumps are size of pecans throughout.
    2. In a small bowl, mix together the egg yolks and milk until blended. Add to flour mixture. Mix on low speed for about 30 seconds (until dough barely comes together). It won’t look too pretty - it will look like a mess rather than a dough.
    3. Dump dough on unfloured work surface and gather into tight mound. Start smearing dough with your hand so the butter chunks are smeared into the dough and you start to see some streaks of butter in the dough.
    4. Now, wrap the dough in plastic wrap and flatten into a large disk, about 1 inch thick. Refrigerate for at least 3-4 hours before baking into pop tarts. 
Making the Pop-tarts:
1. After the dough has been refrigerated for 3-4 hours, you are now ready to roll out the dough. Cut the dough in half roll out the dough into a big sheet and score into rectangles. Preheat oven to 350 degrees. 
2. With 1 egg slightly beaten, lightly brush the entire surface.
3. Start spooning the jam of your choice into the center of the rectangles. You may now cover by folding over the dough which is right next to your jam spoonful, or you may cover the dough with the other half of the dough, rolled out. 
4. Cover the jam mound whichever way, and press down on the sides around the jam pocket. Be gentle of the jam will spill out and create a huge mess! 
5. Now using a knife, cut and separate the pop-tarts and score the ends with the end of a fork. Separate the pop-tarts onto a baking sheet. 
6. Bake in the oven for about 40 minutes, or until the tops of the pop-tarts are slightly golden brown. 
Simple Vanilla Glaze: makes about 1/2 C
  • 1 C confectioners’ sugar
  • 1/4 tsp vanilla extract
  • 2 tbl water
  • Sprinkles of your choice
     
    1. While the pop-tarts are cooling, mix together confectioners’ sugar, vanilla and water. 
    2. Pour over pop-tarts after they have cooled and sprinkle with sprinkles!
    3. Let sit for about 10 minutes. 
Voila! Yummy home-made pop-tarts. Perfect for breakfast on-the-go, or just a snack during the day. None of this store bought business, make them at home yourself! It’s more fun and garaunteed they will taste better! You can mix and match the fillings with pretty much anything. Previously, I’ve done a Nutella filling (to die for) and a strawberry jam filling (always a winner). Anything you want, I know you will love these delicious, flaky pastries!
xoxo, A